Wednesday 29 February 2012

Addicted to Earwarmers..another Pinterest Procrastination and more unfinished projects!

I am sitting at home bored and restless and undecided between being hungry, not being hungry or being a bit naseaus (I hate when I get into this state) This is of course a craft (most of the time) orientated blog and there is actually very little of my creations shown! Well, I've set about to remedy this... what good is a blog without a million photos of pretty handmade things to look at and maybe inspire you? :p

As you may know I have recently learnt to crochet... this has led to the completion of some really lovely projects I never thought I'd be able to do! One of those projects being how to make crochet earwarmers/headbands... Now that I know how, I just can't stop! I've already made myself one with some 'practice' wool I had around the place, and decided I should make myself another one in nicer wool. I have nearly completed this one, it's a lovely purple colour and the flower will eventually be ivory and purple layered. I'll be well prepared for winter when it eventually rolls around (still summer and it is soooo still and hot tonight!). 


Maybe I should finish it tonight while the hubby is out... it's always a good excuse to whack on a favourite movie! I have a few other projects I have yet to finish!


Like these hardly-started pair of baby booties!


sorry the photos aren't the right way around, Blogger doesn't want to upload them properly tonight!

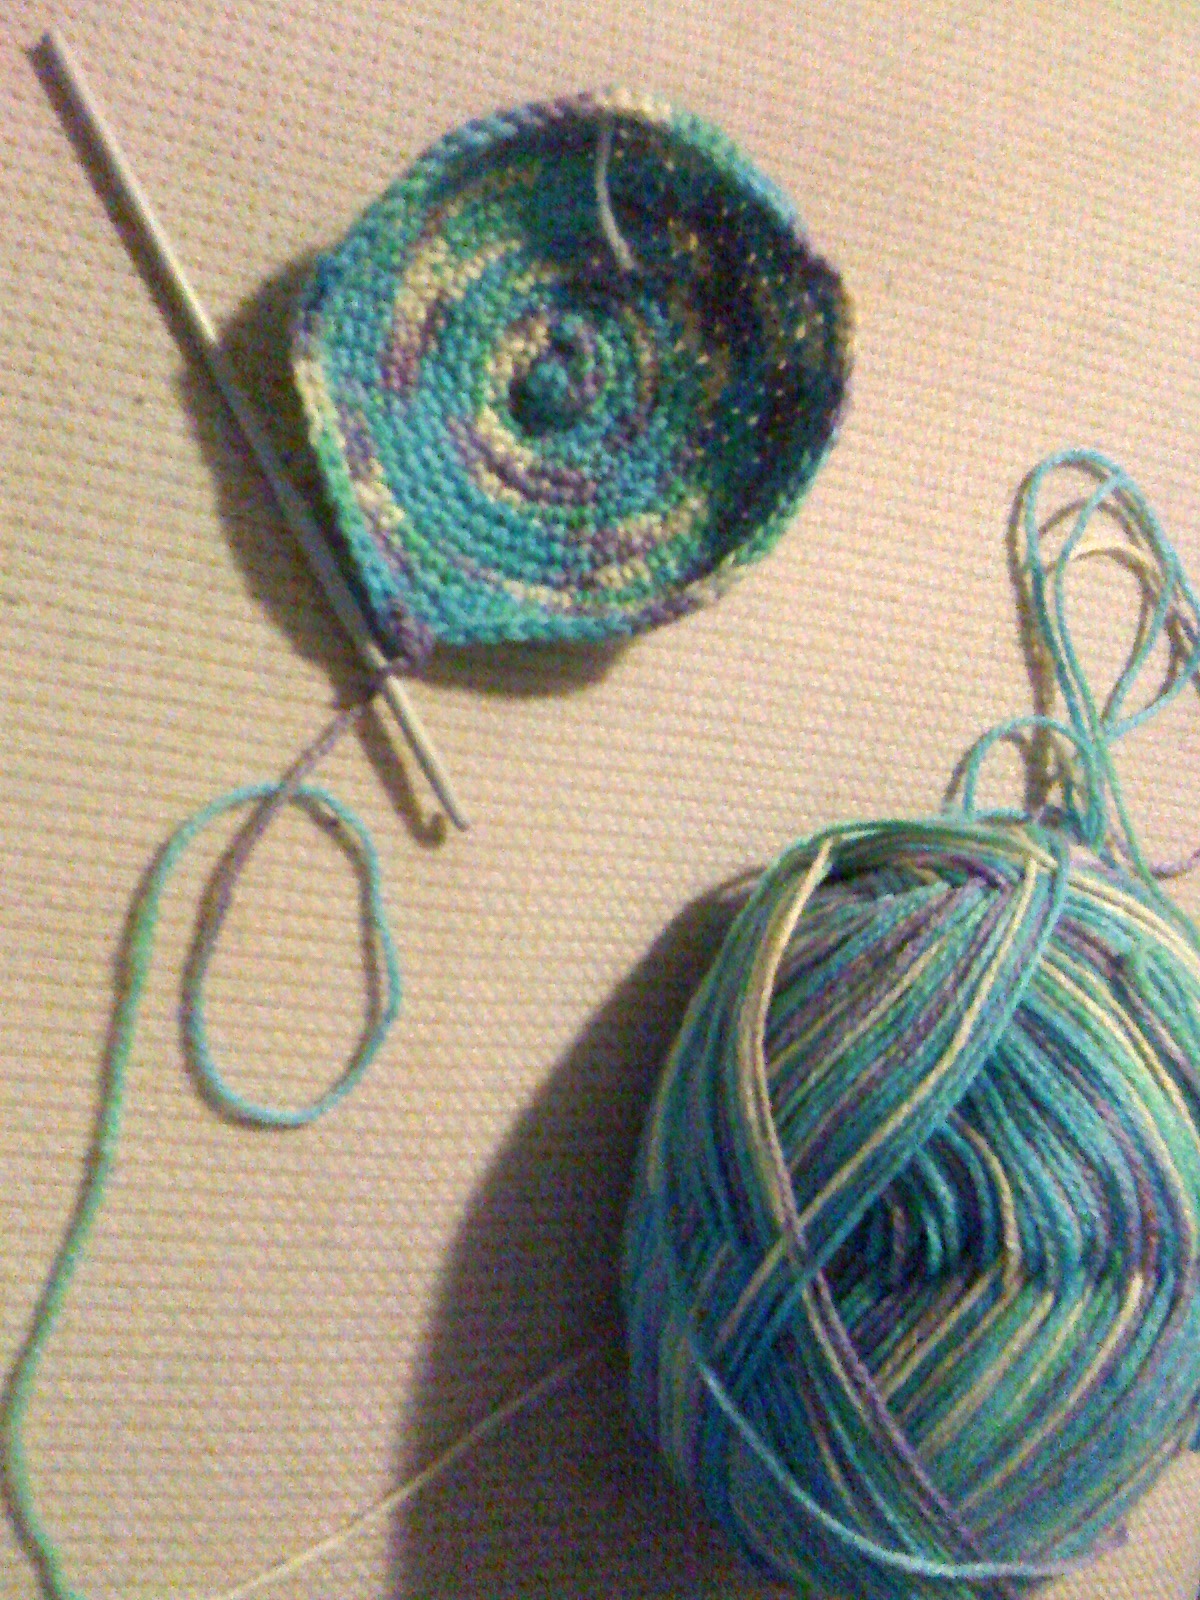
Or this single crochet (and a very slow increase with a 3.5mm hook!!) baby beanie I started yesterday (isn't the wool gorgeous! Im a sucker for those multicoloured yarns!) 14 rows down, probably another 5 to increase and then I can finish the length! Painstaking, but it'll be worth it!

I also have a half finished white wool ribbed knitted scarf to finish, and a divine soft pink crochet scarf aswell. I'm such an old lady, both those projects are in my bedside drawers, I knit and crochet before bed each night! I find it very relaxing :)

OR I could just continue browsing through Pinterest at all the lovely crochet ideas I'd love to try...


Source: etsy.com via Nike on Pinterest


How cute is that!?! And hey! It matches my earwamers!!


These are soo sweet!


Source: etsy.com via Angelica on Pinterest


Don't mind all the baby themed crochet...I'm a bit clucky at the moment!


LOVE that wreath!!


Source: google.nl via Chantal on Pinterest


Source: google.nl via Chantal on Pinterest


Ok...I shall tear myself away from my laptop and actually get to work trying out some of these amazing ideas! I'd better finish my unfinished projects on hand first though :p

Leap Year Wordless Wednesday ~ What A Hard Life!


Happy 29th of February everyone! And Happy Birthday to my dear friend Bec who is today turning 7! Xxx

Friday 24 February 2012

I jumped on the band wagon with this one...but it's so cute!!


After a week of learning to crochet from scratch, I think I've made great progress! I've always loved the look of these owl beanies and just had to try one out for myself! I actually started this at midnight last night when I had another 'night owl' episode (no pun intended) and just couldn't sleep. I finished it not long before writing this post :) It's not perfect but I am so keen to try other themed crochet hats! There is a gorgeous 'My Friend Totoro' hat I am dying to try!

*Free!* Printable 'Cute as a Button' Baby Shower Pack

Hi guys!

Just a quick post today, I'm not feeling my best with an upset stomach and will be spending a lot of time today on the couch with my puppies watching Band of Brothers (a HBO series, very moving!) and crocheting my first earflap hat. Green blue and purple wool, it's gorgeous and reminds me of fruit loops!

But despite my ickiness today I have something special for you! I designed this 'Cute as a Button' baby shower invite pack and want to share it with you for free! This one is for boys! You can download it, add your own details and print it to your hearts content! Though, as always, FOR PERSONAL/HOME USE ONLY (just dont resell them, mass produce them, copy part of it, change the design and all the other usual stipulations).  The pack comprises of two invitation templates, place cards, a poster, and bunting! All images have been saved at a high res so you are able to resize them as you wish.


Enjoy!! There never seems to be a nice neutral boys themed baby shower pack about when you want one...now there is! :)

-Tash Xx

Thursday 23 February 2012

Chocolate and Cream Ribbon Headband Tutorial


Hi guys! I'm winging this one from my couch today, as I'm not feeling too fantastic (my hubby and I seem to have caught the 'summertime' bug)...This is a super cute elastic-free tutorial and can be fitted to any size so you can make it for a special little bubba in your life, it would make a lovely baby shower and baby birthday gift. I have a few friends with bubbies due next year (and by a few I mean 8! must be something in the drinking water hehe), I'm going to have a lot of baby shower gifts to make!

So let's get started... as you can see here, your materials list is fairly simple. I've chosen to make mine brown, ivory and blue (my favourite colour combo). You will need:

-A comfy couch and a cup of tea are a complete necessity for this one, I would have ice cream but Im not sure my stomach would thank me for that at the moment!

-A piece of satin; a scrap will do, you will need roughly a 30 x 30cm square
-A length of wide organza ribbon, to fit it to your head, simply measure it to fit from behind one ear to the other leaving about and inch on either side to attach your tying ribbons onto.
-Some tying ribbon; I like to double mine over at the ends of my headband so you will need two pieces about 50cm long
-Three large buttons; I've chosen a set of ivory buttons I picked up for 50 cents at the local fabric store
-Needle and thread; I've used white so you can see it for the tutorial :)
-Hot glue gun (as always!)


Making Your Headband:

1. Take your organza ribbon and your two lengths of tying ribbon. Hold one end of the organza ribbon between your fingers and about an inch from the end, fold it in half. Then fold in half again, and then again.


2. Take one piece of your trying ribbon and loop the middle an inch from the end of the organza where you've folded and tie a knot. Take the tail of the organza and fold it upwards, tying another knot. Take the leftover tail and fold it down, tying a double knot this time. Repeat on the other end of your organza. Refer to the image to see how I've done it :) It's pretty simple.


You've now got your basic headband!

Making the Flowers

1. Cut three strips of satin about 40cm long, your first about 6cm wide, the second piece 4cm wide and the third about 3cm. Precision isn't important here today...I'm sick and can't be bothered finding a ruler.

2. Thread your needle. Take the first strip of satin and fold in half. Along the open end, sew a quick running stitch by hand....


gently tugging on the thread as you go so your fabric looks like this:


3. Once you have a full circle, you can cut off the tail. Overlap the two edges and close to the centre stitch them together and tie it off on the back. It should look like this:


Repeat with your remaining fabric strips.. You've now got your flowers!


Don't worry too much if the satin had frayed in the centre, because now you're taking your buttons and hot glueing one to the centre of each flower :) I have to leave the couch for this part, my glue gun cord didn't reach to the coffee table!

4. Arrange your flowers on your headband how you'd like them, I like mine fairly low on the headband so the flower cluster is to the side when I wear it. Cut out a circle from your remaining satin to act as a 'base' for your flowers; when glueing on your flowers, position the circle underneath the headband first. This will not only make your flowers more stable on the organza, but it will also help to not burn your fingers in the process!


Voila!!! You now have a beautiful couch-headband! Simple to make yet such a gorgeous addition to your hair accessories don't you think? Now to make another 10 in different colours ;)


Happy Headband Making!!

Though if you don't mind, pretty please don't sell headbands you make from this tutorial;  I create tutorials for home-use only..it wouldn't be fair to sell them k? :) Thankyou kindly in advance!!!

I'd love to see your creations! Email them to me at thequirkycraftingshmooglebean@gmail.com and I'll post them here on my blog :)

-Tashy xox 


Pretty Purple Fabric Flower Headband

Well ladies, here it is! My very first tutorial I would love nothing more than for you to have some fun and tap into your own inner-creativity to make headbands in any colour and size you like! If you're like me and love accessorising your outfits with that perfect item but just can't find that special something, just make yourself one! They also make fantastic gifts and with Christmas just around the corner, it's the perfect thing to do! I hope you have as much fun making these gorgeous headbands as I do... they're so so adorable!

I was feeling particularly girly today so I have picked a gorgeous pale yellow and purple fabric for my flowers, pale yellow buttons for my centres and a lavender spandex lace for the headband...worked out quite nicely don't you think?
You will need:


  • a 1/4 of a metre of your favourite coloured fabric. I'm using cotton today but satin works just as well
  • a pair of sharp scissors
  • glue gun and some hot glue melts
  • needle and matching thread
  • buttons to match your fabric
  • a 12.5 inch long piece of spandex lace (available at most crafting shops)
  • a 5.5 inch long piece of elastic
  • 2 x 5cm pieces of matching ribbon
  • a coffee cup (empty of course)
Trace around the brim of your coffee cup onto the back of your fabric 20 times and cut out your circles...these circles will become the petals of your flowers; there are two flowers to this type of headband with 10 petals on each flower.

To make your petals, take a circle and fold it in half. You can iron the crease to make things easier


Fold in half again and iron your crease


Do this with all the remaining petals


Take your needle and thread and pop two stitches along the bottom of one petal
Do this about a 1/4cm in from each edge and a 1/2cm from the bottom edge
Do this with 9 more petals and tug the thread as you go so your flower begins to take shape


Your flower should look like this!


Once you have threaded all 10 petals on, pop your needle through the petal you started and tug on it gently with to close the flower


Run a stitch or two back and forth through the two petals to secure it, then stick your needle down through the fabric and tie a knot on the back


Repeat the process to create your second flower. They should look this this:


Cut out two small circles of left over fabric about the size of a 50 cent coin and hot glue one on the back of each flower to secure your petals in place


Glue your buttons on over the centres of your flowers


Take your 12.5 inch long piece of spandex lace and stitch your 5.5 inch long piece of elastic to each end of the lace. Be sure to stitch it on securely so it won't come loose.


Take one of your 5cm long pieces of ribbon. Wrap it and glue it down over the stitching on your headband. Repeat on the other end.


Have a play around and decide where you would like to position your flowers on your headband. Once you have them where you'd like them, use hot glue to attach them to the headband. Cut out two small circles about 7cm wide and use these to glue over the lace on the back of your flowers.


And there you have it! Your very own fabric flower lace headband!
For personal use only though please, I'd appreciate it if you didn't sell items made from this tutorial; it's just courtesy :)


I would love to see everyone's headbands! If you email your photos to me at
SewSweetHandmade@gmail.com
I will feature them here on this blog!

This is my very first ever tutorial so if I have missed something, or you would like to ask a question...please don't hesitate! :)

Enjoy! xox