Friday 30 March 2012

I love being a craft-a-holic!

My name is Tash and i'm a craft-a-holic!

There, I've confessed! Your turn! :p


I've been a busy bee these past few days immersing myself into various little projects! Nevermind the housework or the cooking or the taking care of my sick husband...actually that's not entirely true, I have been taking care of my sick husband but the housework and cooking duties have suffered. I needed to do the important stuff first!

So let's see, what have I been up to? Well, I started making granny squares for a blanket Im making for my grandmother to send to her this winter. I have to say I now fully appreciate the time and effort that goes into these things!! I'm not a particularly fast crocheter...you know, not one of those people who you can sit and watch and a blanket magically appears growing inch by inch every second...nope that is definately not me! I can't predict how long it will take me to finish, but I enjoy the process.


So far I've joined enough squares to get the width of the blanket i'd like, and now it's just a matter of crocheting my little heart out! It's a fantastic evening after-dinner (provided I've actually cooked some) activity as I find it very relaxing. It's a gorgeous mint green and chocolate brown colour combo, intended to be a small throw for my grandmothers couch. Granny squares are suprisingly quick and simple! It's the sewing of all the loose ends in that is the time consuming part. I will hopefully have it done by the end of autumn! (fingers crossed!)

I've also found myself getting back into the groove of painting recently! To be honest I haven't picked up my paint brush in almost a year then all of a sudden I have completed water colour paintings in front of me! In following with my 'Journey of Autumn' series I thought I'd be inspired by the colours of the seasons and do some themed artworks. I suprised myself with what I was able to do, after so long I worried I'd lost the skill but all I needed was the right inspiration and some soothing background music and look what happened...


Very rarely do I actually share my artworks with anyone, but this time I decided to post a photo of one of my paintings in an online group, and the amazing ladies (and lads!) were just so supportive and kind towards it that I was inspired to open a business page of Facebook for my art! It feels amazing to finally be able to share my artworks with the world after so long of being told I should! They may sell, they might not, the point is just that you have to get your name out there somehow through crook or through nook, and as far as I am concerned, as long as someone, just one person, is seeing them, regarding them and appreciating them I will be happy. At the very least, with the closing down of my craft shop I am well prepared to tackle Facebook business pages again. It can be extremely competitive, people try to bring you down, and you fight for your place to be recognised. Not this time! This time I've learnt enough to know that my art will ALWAYS come first, and that I do it for the love and joy of it and not for the sake of anyone else. What I will always remember is that whilst you may not feel that you are making impact, you may feel that you aren't as good as the people around you, you do what you do because of who you are. If you stick with it, through thick and thin then you will come out the otherside and all of a sudden realise how appreciated what you do is, and that you have created your very own niche, just for you that no one else can take away from you.

My busy bee creations didn't stop there though! I whipped up this fun bright red 'Lil Devil' earflap beanie for a friend of mine who is going through a rough patch at the moment, I thought it would cheer her up a little.


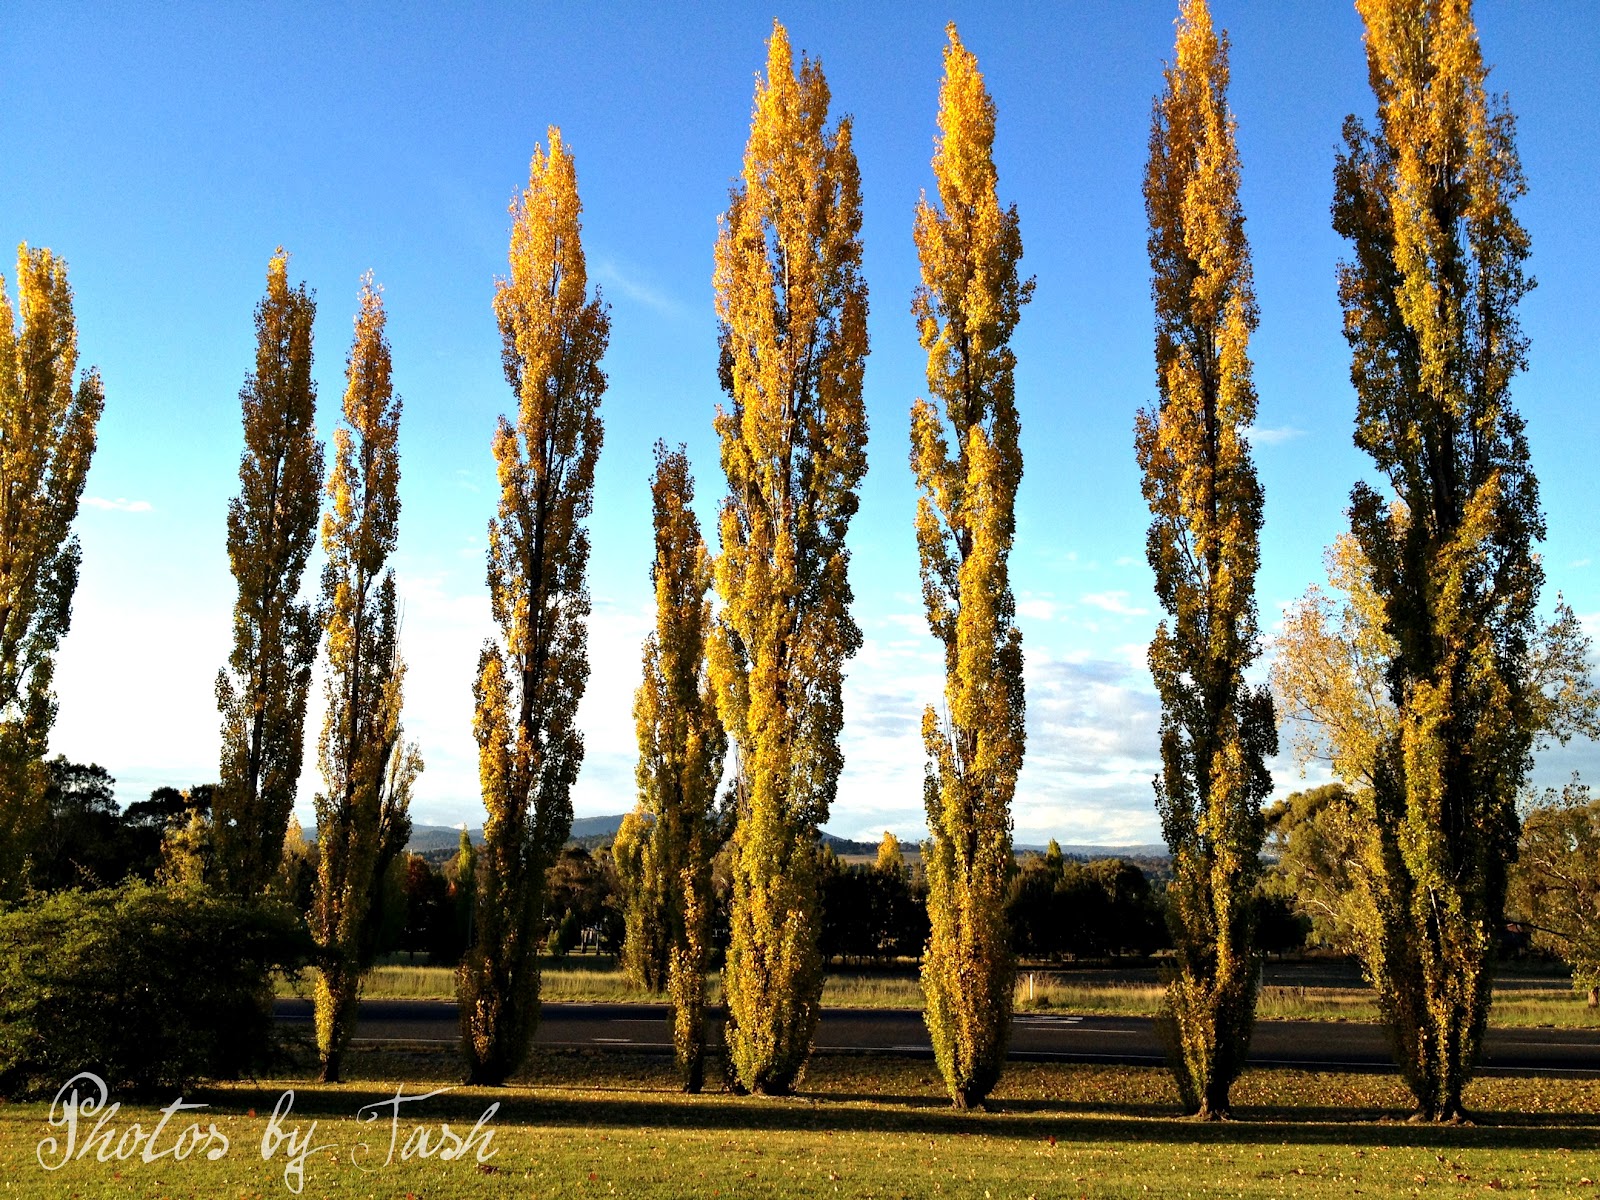
Then went to the park with the hubby one afternoon to play around with some late afternoon photography for Part Four of my 'Journey of Autumn' series...I guess I could give you a little sneak peak :p Part Four is due to be published this Saturday and there are some amazing photographs as we get further into the season!


I crocheted myself a hat in one of my favourite colours to match my cardigan...


and made my first own design patter crochet beret tutorial and on top of all that, yesterday I made my first dress with the most adorable cherry patterned fabric I have ever seen! It was so rockabilly, it was so vintage, it was so beautiful and it just absolutely had to come home with me to be turned into a dress!


I had no pattern but the concept of a pillowcase dress seemed simple enough! Not entirely so... I ended up the first time round making the armholes MUCH too big! I sat for a while pondering how to fix it and eventually deducted that the easiest way would be to cut about 4 inches off the top of the dress and re-sew the tie in...solved the problem perfectly! It is really just 2 x 2m wide pieces of fabric sewn together with armholes cut into it and hemmed, which when you add the underbust belt gives the dress that nice flair at the bottom! It is essentially a traditional pillowcase dress, I just chose to use a stiffer fabric instead of something flowing as I am very curvy and didn't want anything that would cling to my lumpy bits! And I am a big fan of vintage AND I love cherries so this turned out perfectly! It will be my birthday dress for next Saturday (my birthday falls on Easter Saturday this year!) so now all I have to work out is what kind of vintage hair do to go with it and a headband with my remaining fabric.

It really was a very simple dress to make! I am working on a tutorial for it the same way I made mine so keep an eye out for that one!

Naturally to find inspiration for accessories and hair dos I went on another Pinterest Peruse!


Source: google.com.au via Tash on Pinterest


Source: google.com.au via Tash on Pinterest


Source: wanelo.com via Kristel on Pinterest


The only thing is that on top of all this craftiness that will continue to happen over the next week we are expecting visitors at the same time in our tiny unit! I guess my house-wife duties will have to kick back in at some point! We have a friend staying with us a few days this week, family staying with us over Easter and after that another family member coming to visit for a few days after that! Busy busy busy! I was also hoping to get a few sketches in aswell, but that might have to wait!


Monday 26 March 2012

The Journey of Autumn ~ Whilst watching the leaves fall...


Whilst watching the leaves fall, listen to the sounds of the season! I've put together a collection of Autumn themed music by a few of my favourite artists. For each song, close your eyes, invision yourself in a forest, by a lake, in the city and immerse yourself in the cool breeze, the leaves swirling around you, the sounds of rustling as the wind flows through the tree tops, the trickle of a stream, the sounds of Autumn.


Sunday 25 March 2012

A bit of baking and a bad mood

Let me just state a very simple fact that I have learned today....

Baking + A Bad Mood = Guaranteed Disaster!!

I have an absolutely awful day, stress galore and just a tad moody and upset and it hasn't been progressing well. It's 11pm at night and I feel like bed is miles away from me, Im just so strung out! I do have herbal sleep assist pills that I can take but I try not to unless things are unbearable. I guess that's the fun of living with anxiety and depression! But anyway...

So I decided this afternoon after doing a bit of pinterest perusing (how neat is that word?) that I was going to make cupcakes. I wanted to make a few to share with our neighbours who I think are a bit shy, but seem very kind so they're sort of an ice breaker. I hope they like cake! So I decided I wanted vanilla bite sized cupcakes with tiffany blue icing, silver cachous and handmade seashell ganache chocolates on top... and thankfully despite the mood issues most of them turned out wonderfully and just how I had pictured! Probably a bit too over the top for their purpose, but inspiration must be made reality when the urge takes you!


Though of course, some kept falling over due to being a tad top heavy and the icing got ruined, and the chocolates wouldnt come out of their moulds despite a lot of frustrating banging on the bench (which probably annoyed my poor neighbours as we share a wall)...and one cupcake MIGHT have been flung at high velocity at the walls at some stage leaving a very artistic blue spatter on my white walls. Luckily at that point my wonderful husband came to the rescue and took over for me, while I very childishly stormed off to hide in our room and brood on my frustrations. And so here I am now! Reflecting on my terrible day and crankiness (is that a word?). It wasn't ALLLL that bad though, parts were good! For example I got hooked to watching a series called 'Spaced' which stars two of my all time favs Nick Frost and Simon Pegg, and I am absolutely loving it! And I also discovered that my strawberries which I may have forgotton about for a few weeks, and were looking very brown and 'crunchy' got some good watering yesterday and low and behold they have bounced back!! They're sprouting new leaves and going for gold the little fighters! They are very understanding of my lack of garden experience I think! Ohh, I almost forgot! My EXTREMELY naughty foxy decided he was going to make a load of havoc today and did everything he could to annoy me including ripping open a rubbish bag we had yet to take out and spreading it's contents all over my newly vacuumed loungeroom floor!! The little devil got kicked outside on his chain for a few hours after that, but then after dark fell we fell sorry for him and gave in to his whimpering and let him back in. He's been very sheepish since then, I think the lesson finally sank in!

I realised also that I am a bit behind in my 'Journey of Autumn' posts, I have a few for the coming days already drafted (you'll love them!) but all the trees turn so fast here that I'm going to need to work fast these next few days and get some snaps before there's no leaves left!! Just a note here...while Autumn in Armidale is just lovely, once Winter kicks in the place looks a bit like Russian winter. Bleak, grey and not a leaf to be seen! And did I mention FREEZING! It seriously baffles me as to why it doesn't snow here more often! I have some lovely paintings to show you, a few songs I've found (not mine, good Lord you don't want to hear me sing!) and there may be a short story in the making too.

So now that I have made my confessions and thankfully picked up on the bright sides of today, and started to ramble I definately think it is time for bed!

Friday 23 March 2012

10 Reasons Why I Am The Way I Am!

 I always think there are always individual quirks to all of us that make us who we are...and I always love finding out more about my fellow bloggers and readers, about what makes them tick, about their personalities, things that not many other people really know about and those fun quirks that defines them! I've put together these '10 reasons I am the way I am', just as something fun and personal to share with you and I encourage you to do the same! Hop into Paint or Photoshop and make 10 reasons why you are the way you are, just little things, things like what you like on toast; and share them with someone! Just for fun =) It's chilly here today, I'm having guests over later and still have housework to do...so what a better time to write a blog post!! haha!


Your turn! What are 10 things that are a part of you and help to make you who you are as a person?

The Journey of Autumn Part Two ~ Turning of the Seasons


Monday 19 March 2012

Crochet Beret with BowTutorial


 Welcome to my first crochet tutorial!
I really never thought I'd be able to crochet...let alone coming up with a pattern and turning it into a tutorial/pattern for someone else to follow! Needless to say that the whole process seemed a bit daunting but I still really wanted to give it a try. I should probably mention that I've literally only learnt to crochet in the past two months or so, I'm definately no seasoned expert BUT in that time I have been learning quickly and coming up with a few of my own things already (you may have followed my learning process and seen some of my creations) so if you're new to this (like me) then this craft-a-long will be perfect for you; we can learn from each other! This is my very first time publishing/writing out a crochet pattern so pretty please be nice to me! I have tested this, I wrote it out as I went with a practice beret and corrected anything that seemed out of place.
Right, enough of my trying to reassure myself...let's start the project!
NOTE: PLEASE do not sell this pattern or alter any part of it, or sell items created from this tutorial. After making my first crochet tutorial, and putting many many hours into it I can fully appreciate the amount of effort that takes to put one of these together and would hate for someone else to take the credit for all that work. You're welcome to make as many as you like for personal or gift use though of course :)


Crochet Beret Tutorial


For this project you will need a size H hook (5mm) and 3 different colours of worsted weight yarn. I've chosen a grey, a violet and white for my beret and I've tried to stick with some lighter colours so you can see the progress in the photos if you get stuck. You suprisingly won't use up a lot of yarn with this project, my 3 balls of yarn are leftover from other projects, there's probably half a ball of white, and less than half a ball of my grey and violet.


The stitches we will be using for the beret are:

Half double crochet (hdc)
Chain stitch (ch)
Slip stitch (sl st)
Increase (Inc)

You can find how-to videos on the basic stitches here if you need them. I used these videos when learning to crochet, they are very easy to follow.  I have inluded in GREEN the amount of stitches you should have at the end of each round. You can give or take 1 or 2, the pattern is very forgiving and you won't notice them in the end.

Beret - Part One

To start make a magic circle, ch 1 then work 6 hdc into the loop, join with a sl st into 1st stitch. Ch 1.
Round 1: 2 hdc in each stitch, join with sl st. Ch 1. 12 stitches


End of round 1


Round 2: 1 x 1 hdc in same st, then 2 x hdc in next st. 1 x hdc in next st, then inc (2 hdc in same st) Repeat til end of round. Sl st to join, ch 1. 18 stitches


When you reach the end of a round, you will notice there is a gap, count up 3 stitches and out your joining slip stitch into the 3rd stitch (that is the stitch you started with)


Round 3: 1 x hdc into same st, 1 x hdc in next st then inc on the 3rd st (2 hdc in same st). 1 x 1 hdc into next 2 sts then increase (2 hdc in same st). Repeat til end of round. Sl st to join, ch 1. 24 stitches
Round 4: 1 x hdc into same st, 1 x hdc in next 2 sts then inc on 4th st. Repeat til end of round. Sl st to join, ch 1. 30 stitches
Round 5: 1 x hdc into same st, 1 x hdc in next 3 sts then inc on 5th st. Repeat til end of round. Sl st to join, ch 1. 35 stitches
Round 6: 1 x hdc into same st, 1 x hdc in next 4 sts then inc on 6th st. Repeat til end of round. Sl st to join, ch 1. 43 stitches
Round 7: 1 x hdc into same st, 1 x hdc in next 5 sts then inc on the 7th st. Repeat. Sl st to join, ch 1.
49 stitches


End of round 7. You should have a circle roughly 6 inches wide.
Round 8: 1 x hdc into same st, 1 x hdc into next 6 sts, inc on the 8th st. Repeat. Sl st to join, ch 1.
55 stitches
Round 9: 1 x hdc into same st, 1 x hdc into next 7 st, inc on the 9th st. Repeat. Sl st to join, ch 1. 60 stitches
Round 10: 1 x hdc into same st, 1 x hdc into next 8 sts, inc on the 10th st. Repeat. Sl st to join, ch 1. 67 stitches


You're now finished using your first colour! You should have an 8 inch circle (roughly, doesn't matter if it's not exact)


Beret - Part Two


Now we're going to change colours on our beret! It's really not that tricky at all, even weaving in your ends isn't hard with a bit of practice! I'm no good at explaining this part so for the next section of this tutorial, we're all going to refer to the video HERE. Teresa is crocheting a granny square but you change colours the exact same way on a hat; you also fasten off the end of your first colour the same way on a beret as in the video too. I like to leave a fairly long tail when fastening off (mine is 6 inches long just to be on the safe side) At 1 minute 40 seconds on the video, you can pop back over here and we'll start on the next part of our beret. Don't worry too much about your loose ends, we will weave those in later on.

Round 11: With your new colour joined onto your circle, you will continue to increase the size of your beret. 1 x hdc into the same st (that you just added your new colour onto) then 1 x hdc into the next 9 sts increasing on the 11th st. 71 stitches


Beginning of round 11. Repeat until end as with previous rounds.
 Round 12: 1 x hdc into same st, 1 x hdc into the next 10 sts. Inc on the 12th st. Repeat til end on round, sl st, ch 1. 77 stitches
Round 13: 1x hdc into same st, 1 x hdc into the next 11 sts. Inc on the 13th st. Repeat til end of round. Sl st, ch 1. 82 stiches
Round 14: 1 x hdc into same st, 1 x hdc into the next 12 sts. Inc on the 14th st. Repeat til end of round. Sl st, ch 1. 85 stitches
Round 15: 1 x hdc into same st, 1 x hdc into the next 13 sts. Inc on the 15th st. Repeat til end of round. Sl st.  91 stitches


Your circle should be between 10 and 11 inches in diameter after the 15th round. Mine is curling up a little around the edges because I've used a different ply yarn for my second colour (that's just what I already had in my stash) but it won't change the end result by much at all.

Beret - Part Three

Ok so now we're going to change to our third colour. Use the video provided above to guide you through the process if you need to recap. I'm using white as my third colour.


Adding in your third colour and beginning round 16

Round 16: 1 x hdc into same st, 1 x hdc into next 14 sts. Inc on 16th st. Repeat til end of round. Sl st, ch 1. Now, it would appear that I have miscounted my stitches somewhere along the way, or lost or added a few (whoops!!) so I'm not going to keep counting the stitches, I fairly sure you've gotton the hang of it by now :) As long as it still looks like a circle you're doing fine.

Round 17: 1 x hdc into same st, 1 x hdc into next 15 sts. Inc on the 17th st. Repeat til end of round. Sl st, chain 1.


You will have something that looks like this! It should measure about 12 inches across the middle.

For rows 18 and 19 you're just going to put 1 x hdc in each st around in the same colour you're using. (bet it feel good to stop counting!!!) Your hat is now roughly 13 inches across. It's not going to fit on your head as it is so we need to start making the opening smaller so that the beret begins to take shape and fits comfortably.

Row 20: Change your yarn back to your first colour (mine is grey). 1 x hdc in every second st around. Sl st. Fasten off thread.
Row 21: Change yarn to the second colour you used (purple). 1 x hdc in every st around, sl st. Fasten off thread.
Row 22: Change to your third colour yarn (white). Repeat row 21.
Row 23: Change to your first thread again and repeat row 21. This should be your last row, it fits my head comfortably at this stage but you may need to add a row or take one off to suit.


Underside view (complete with all your tails to be weaved in!)


Top view

You will notice you have a lot of tails hanging out of your hat? We need to weave those in and out of the way. I have found that this video
here demonstrates the process best. Now, it says to use specific needles for weaving but I just use a regular darning needle with a large enough eye to thread yarn through. I wasn't too specific about where I weaved my needle through, as long as it was through the same colour as the tail and felt firm when gently tugged.

You're onto the last and final step!

Bow - Step Four

 You will need:
A length of ribbon in your choice of size/colour/pattern etc roughly 45 inches long
A Safety pin

Weaving in your ribbon! For this step you can use pretty much whatever ribbon you like! I absolutely love purple so I've chosen an inch wide bright purple ribbon. Take your safety pin and put it through the top of one end of your ribbon. Weave your ribbon inbetween every second stitch through the second row up from the rim of your hat. Be sure to keep your ribbon flat whilst weaving.


And you're all done!